Rhubarb might not be the first plant that comes to mind when you think about making home-made wine, but it’s super easy to grow and look after and can be used to make the most versatile wines from very sweet to very sharp, making it super popular.
Why is rhubarb so popular?
Rhubarb can grow for around ten years and doesn’t really suffer from any kind of pest infestations and is super easy to grow and care for.
The stems can be used to make wine, but also for jams, puddings and sauces and most famously, for rhubarb crumbles and pies, making it a very versatile plant to have in the garden.
One of the reasons rhubarbs does so well in the UK is that it likes a cooler climate and cooler temperatures. It’s important to note however, that the stalks are the only edible part of the plant, and the leaves are actually toxic.

Rhubarb will grow for years if you provide it with a great space and in soil that is well fertilised with plenty of compost.
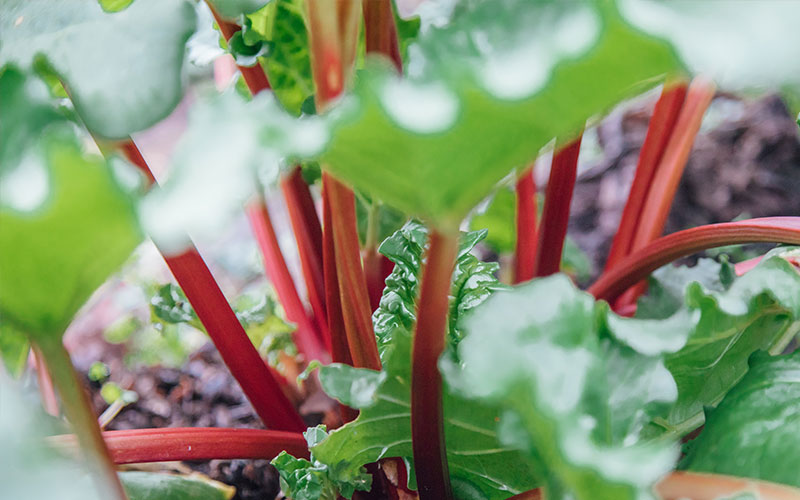
Not only does this plant provide you with great stems to make wine and desserts, it also adds amazing colour and structure to your garden and is beautiful to look at.
How do I plan for growing my own rhubarb?
If you are planning to make your own rhubarb wine, the first thing you need to do is find the perfect spot to plant your rhubarb.
It likes to be in the sun in the summer months and doesn’t like soil that is too wet.
It does need lots of nutrients so soil that is full of compost or manure will be perfect for this plant to grow and to thrive.
Bear in mind that rhubarb can grow up to three feet tall and wide, so it needs a lot of space.
When should I plant my rhubarb?
The best time to plant your rhubarb is in the late Autumn or early springtime. If you plant rhubarb crowns in the autumn time you should get your first crop by spring.
If you plant in the spring, make sure the plants are just starting to grow their leaves first.
The best way to plant them is to use one year old rhubarb crowns which you can get from any garden centre.
They will be in small pots already growing and it’s much easier to grow rhubarb this way than to try to grow it from seed.
Once you have selected where you are going to plant them, make sure to get rid of any weeds from the area and dig some large holes, leaving at least three feet between each one and allowing the same distance between rows of rhubarb.
You need to plant them, so the tops are about two inches under the soil and make sure any buds are pointing upwards. Cover them over and give them a good watering.
How do I make sure my rhubarb grows well?
One of the problems with rhubarb is overcrowding as this plant does need space so you will need to dig them up and split the roots every few years to divide the plants and encourage good growth. You can do this in late autumn or early spring.
Rhubarb needs moisture so water them well and use a layer of mulch or straw to help keep the moisture in and the weeds out. You need to remove any seed stalks when you see them, to keep the plant healthy.
In the Autumn remove any debris and cover the rhubarb with compost to avoid frost and to help prepare them for the next year.
How do I harvest my rhubarb?
Ideally, when growing your own rhubarb, don’t harvest during the first year as you want the plants to become established and to grow well. Harvest lightly in the second year and by the third year you will have a really strong summer season.
You can harvest when the rhubarb stalks are around an inch in diameter and at least 12 inches in length. If the stalks look thin, don’t harvest them and give the plant more compost or manure as it needs more nutrition.
When harvesting, hold the bottom of the stalk and twist it gently off the plant and it should come off by itself. If it doesn’t, you can cut it with a knife. You should always leave at least two stalks for the plant to continue to grow.
Make sure you throw away any leaves and bear in mind that harvesting in the spring will give you more tender stalks than if you harvest in the summer.
How do I store my harvested stalks?
Rhubarb is very easy to store, simply cut the stalks and then keep them in an airtight container in the fridge for a couple of weeks, or you can freeze them, and they will last around a year.
How do I use my harvested stalks to make rhubarb wine?
Once you have your fresh spring stalks, full of flavour and colour, it’s time to think about making your first batch of homemade wine.
Rhubarb wine is generally a dry, crisp wine and when made right, has a full and tasty rhubarb flavour.
It’s the ideal homemade wine if you want to impress your friends with your wine-making skills.
Does rhubarb wine taste sour?
The short answer is no, not if you make it properly. Rhubarb can have an acidic kick which can create a dry and sharp wine, but you can control this by using only the youngest spring rhubarb, which is sweeter, and also by using sugar during the wine-making process.
Rhubarb wine can be sweet and almost have a refreshing lemon taste, making it the perfect refreshing wine for summer parties and garden events.
How to make rhubarb wine?
Let’s take the time to look at how to make rhubarb wine, which is very different to using grapes. Rhubarb wine is generally made using a sweet rhubarb juice and introducing yeast to it to create the alcohol as it ferments.
While grapes contain natural sugars and tannins, rhubarb doesn’t so it needs a bit more planning to make wine.
Using commercial yeast and some other ingredients help to give control over the fermentation process and sugars can be used to control the sweetness or sharpness of the final flavours.
In general, rhubarb wine is a dry wine, and the final product has a gold colour.
Can I make my rhubarb wine sweet?
At the end of the wine making process, you will be left with a golden, dry white wine and you can leave it as it is if you like dry and crisp wines.
However, if you prefer sweeter or more dessert-style wines, you can add in an extra step to the process.
You just need to add in sugar or honey into the wine before you bottle it, along with another ingredient which makes sure the yeast doesn’t just turn that sugar into alcohol, making your wine too strong.
You can use something called a hydrometer which will help you to keep track of how much sugar and how much alcohol your wine actually contains.
Knowing this measurement will help you to make sure your wine is on track and drinkable.
What equipment do I need to make rhubarb wine?
You do need specialist kit if you want to make wine, but luckily, it’s nothing overly complicated and you should be able to get most things online or from specialist wine-making shops.
You will need some glass demi-johns and sometimes these can be found in local second-hand shops or recycling centres so keep an eye out if you don’t want to buy them brand new.
You might also find people selling them at car boot sales on online.
Some of the things you will most likely already have in your kitchen, but you will need a few specialist things that it’s best to get from a wine shop, for example, airlocks, corks and a corking machine, and a hydrometer.
You will also need wine bottles and while it’s fine to sterilise and re-use ones you have at home, it’s not advisable to try to reuse screw top lids as they can be impossible to thoroughly clean up.
However, you can buy sterile corks which will fit into any wine bottle, so these are a much better option if you want to avoid contaminating your wine.
If you are just starting out you might want to just buy a winemaking kit for beginners, to make life easier.
To make the rhubarb wine recipe later in this article, you will need the following equipment:
- Two plastic tubs
- A bucket for fermentation
- A hydrometer
- Two demi-johns
- An airlock
- A tube for siphoning
- A funnel
- Six wine bottles
- Six corks
How do I sterilise the winemaking equipment?
It is really important to only use winemaking equipment that has been thoroughly sterilised as if you use anything that isn’t fully cleaned, you could introduce all sorts of contaminants into your wine and ruin it.
Depending on the equipment, there are several ways you can make sure it has been sterilised, for example:
You can put demi-johns and wine bottles in the dishwasher to give them a really thorough clean although you will need to make sure the insides are also clean and clear of excess water.
You can also use an oven to sterilise glass or metal items by heating them at around 170 degrees for around half an hour. You need to then turn off the oven and leave them to cool down inside it.
You can also buy chemical cleaning agents from winemaking shops, which you drop into a container and leave for around 10 minutes before drip-drying. These are good if you are using very large items.

So now I have all my equipment ready, how do I make the wine?
Now to the most important part, all the ingredients that you need to actually start to make your rhubarb wine. It’s always best to use fresh spring rhubarb to avoid the finished wine being too sharp.
So here is the basic rhubarb wine recipe for making your homemade rhubarb wine:
Ingredients
For the fermenting stage:
5lbs of cut rhubarb stems
3lbs of sugar
A cup of black tea
Three litres of water
Two teaspoons of yeast nutrients
A sachet of yeast for white wine
For after fermentation stage:
One Campden tablet
Half a teaspoon of Potassium sorbate
A cup of sugar
Instructions
Prep the rhubarb
The first step in making rhubarb wine is to prepare your rhubarb. If you were storing it in the freezer you will need to defrost it before use.
Wash all the rhubarb and cut the stems into thin slices, around half an inch wide and put them all into one of your sterilised plastic tubs. Pour over the sugar and stir well so the rhubarb is completely covered.
You then need to cover the tub with plastic wrap and leave it for a maximum of three days, to allow the sugar to withdraw all the moisture from the stems, to create a nice pink sweet syrup.

Make the first stage of rhubarb juice
The next step is to boil the water and then allow it to cool down to lukewarm. While its cooling, use some of it to make a big mug of strong black tea and let that cool down at the same time.
Pour the water over the rhubarb and sugar syrup and stir it well to make sure all the sugar is dissolved. Then you will need to pour the mixture through a strainer into a second sterilised plastic tub, catching all the rhubarb stems in the strainer. These can be discarded or used to make a dessert if you don’t want to waste them.
Finally, pour the tea into the plastic tub to mix in with the rhubarb liquid.
The initial fermentation process
Now you are ready to start the fermentation process, so add the yeast pack and your yeast nutrition into the liquid and stir it thoroughly.
Cover the tub over with a clean cloth and leave it undisturbed for around five days to allow the fermentation process to start working.
After the five days, use your siphon tube to move the rhubarb liquid from the plastic tub and into one of the sterilised demi-johns. This can be a fiddly and messy process and you might need to enlist some help.
Make sure the tube doesn’t suck up all the sticky residue which will be sitting at the bottom of the tub as you don’t want this in your finished wine. Now you are ready to start with the second fermentation process.
The second fermentation process
Once your demi-john is full you can fit your airlock into it as per the airlock instructions and then leave the demi john somewhere room temperature or warmer. You will know when the wine starts to ferment as you will hear the water in the airlock dripping.
There will be a guide on your yeast sachet for the temperature the wine should be so you will need to measure the temperature of the demi-john on a regular basis. It will take several days before it even starts to ferment so just monitor the temperature and wait.
Once the process has started, fermentation takes between four and eight weeks to complete and by the end the airlock will only be releasing a bubble every now and then.

How do I age my rhubarb wine?
Once your fermentation process has completed you need to use your siphon tube again to transfer it from the demi-john into a sterilised plastic tub for the next part of the process.
Again, take care not to suck up the debris and sludge residing at the bottom as you don’t want that in your wine.
Once it’s all in the tub, add the Campden tablet into the liquid as this works to prevent bacteria and mould from developing and ruining your wine.
Next, siphon the wine into a sterilised demi-john and if it doesn’t reach the neck, top it up with sugar syrup as leaving too much air at the top will have a negative impact on the wine flavour during this process.
At this stage, you also need to add in the potassium sorbate, to prevent any added sugar from turning into alcohol at this stage as if that happens your ageing process won’t work properly.
Seal your demi-john with a cork and then leave it to age for around six months or so. It needs to be kept upright in a cool and dark place, like a wine cellar ideally, to allow the wine to age properly.
After the six months is up you should be left with a dry, golden coloured wine and you can use your hydrometer to check for the alcohol content. It is likely to be around 13% alcohol.
If you are happy with the dry wine and alcohol level, then you can skip this next step and go straight to bottling it.
How do I sweeten my rhubarb wine?
Try your wine at this stage and if it’s too dry then you can still change that and make it sweeter, by creating a sugar syrup to add to it before you begin the bottling process.
All you need to do is dissolve a cup of sugar into half a cup of boiling water and keep boiling to allow the water to evaporate slightly to create a syrup. Allow it to cool down to room temperature.
Siphon the wine into a clean plastic tub and add in the sugar syrup and potassium sorbate and stir it well. If you don’t include the potassium sorbate to prevent the yeast fermenting the sugar syrup, your wine bottles could end up exploding. Only do this if you haven’t already added it, you don’t need to add it twice.
Final stage
The final stage is to siphon the wine from the tub or demi john into your wine bottles and cork them ready to be stored. While it is entirely possible to drink the wine at this stage, it’s better to store the bottles and allow it to settle and age for at least a month.
Conclusion
As you can see, from starting out with growing small rhubarb plants, to ending up with bottles of delicious rhubarb wine ageing nicely on your wine rack is a relatively simple and straightforward process.
While you will need to invest time and patience in growing and harvesting your own rhubarb plants, and you will need to spend some money on initial purchase of all the winemaking equipment, the results are definitely worthwhile.
If you’re looking for gift ideas more along the lines of red, white and rose wines, check out the range of wine hampers from Virginia Hayward.
